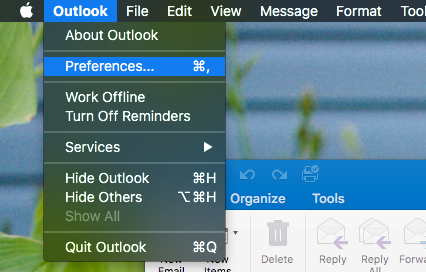
Open up the Outlook application and navigate to Outlook > Preferences.
![image](https://hostedbackstage.com/public_media/2022/09/def9d2bb4ce8101710104d4306c0af1c17130d16.png)
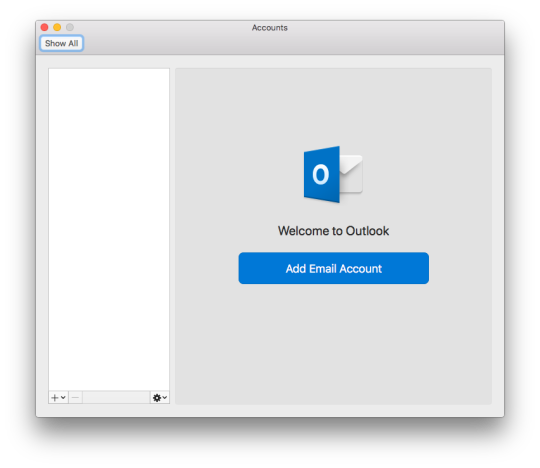
Select Accounts from the new window.
![image](https://hostedbackstage.com/public_media/2022/09/03a20400195579bf8805b6625920a2cd3189dab4.png)
Click on Add Email Account.
![image](https://hostedbackstage.com/public_media/2022/09/8eac584764de8f74fbd21d9ba8ec7d5724923f00.png)
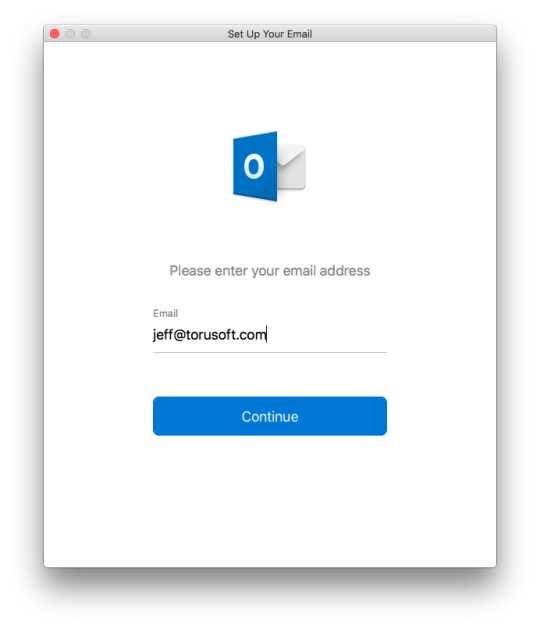
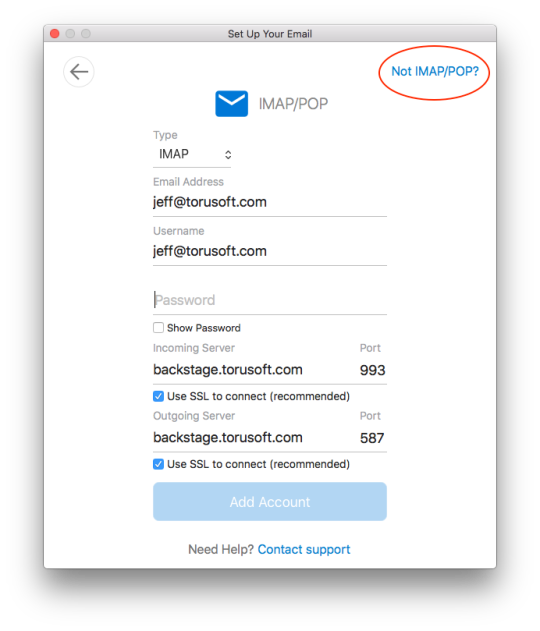
Enter your email address and Continue.
![image](https://hostedbackstage.com/public_media/2022/09/7a685269652962d6d4cfdf74b0d19ecbcee08f8d.png)
In the next window, you’ll want to click Not IMAP/POP? in the top right.
![image](https://hostedbackstage.com/public_media/2022/09/19181ae2d02f8fcec5c6a0dd2e5f110b56028922.png)
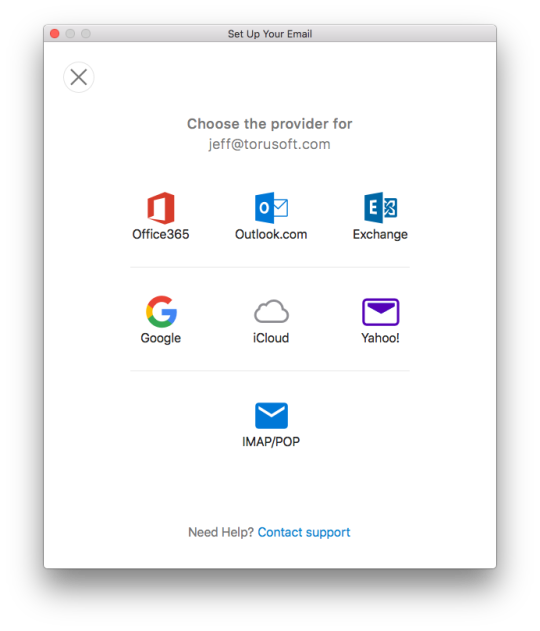
Now select Exchange.
![image](https://hostedbackstage.com/public_media/2022/09/8ad6a6c41d9048d0000c8e0d19c8d0d4e3d6a92f.png)
Enter your username, password, and server (backstage.<yourcompanydomain.com>), and click on Add Account.
![image](https://hostedbackstage.com/public_media/2022/09/c3bc82a49b0910f32d3033b5ebb743db20f9c32f.png)
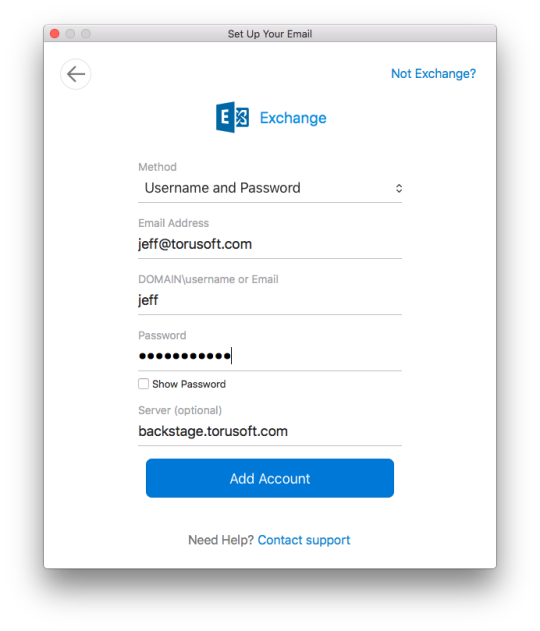
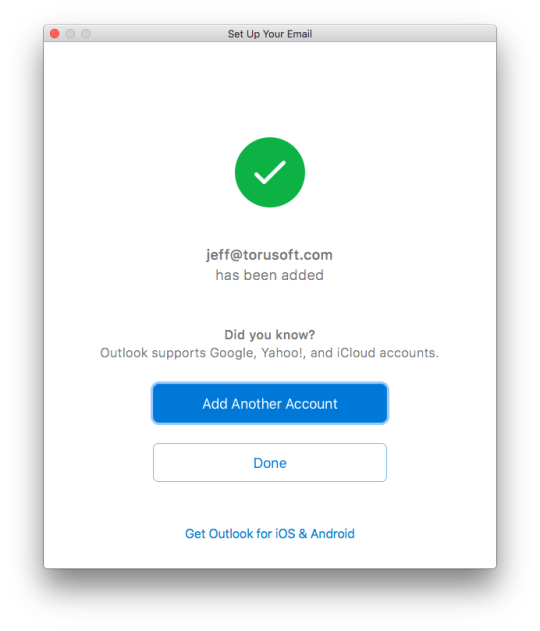
Now you’re all set to use your Backstage Mail account in Outlook!
![image](https://hostedbackstage.com/public_media/2022/09/5f7b78f0881e72772dbea248eb9e2eb858972b6b.png)