This guide will help you setup your Backstage email with your Android device using the built in Android Email application.
First, go to Settings on your device.
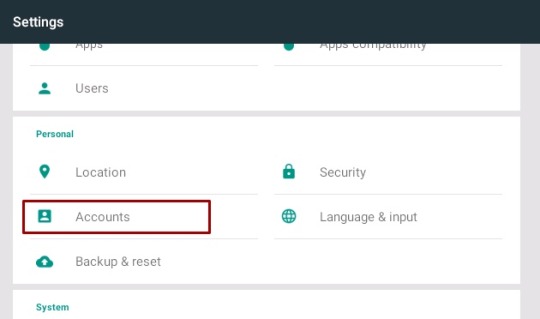
Select Accounts.

From Accounts, Select “Add Account”
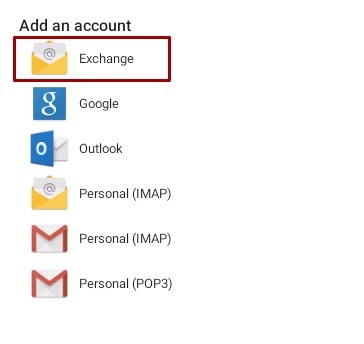
You will get a selection of different kinds of account you can add to your device (the options may be different on your device. Select “Exchange”.
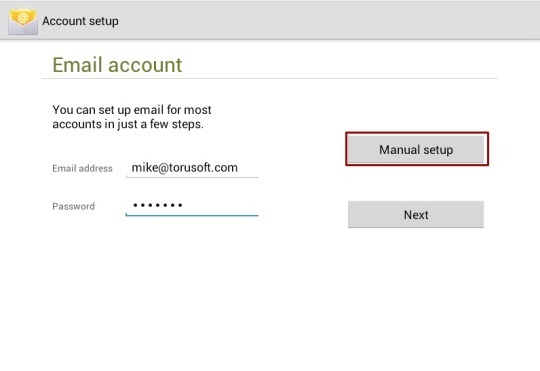
Select “Manual Setup”, which will allow you to enter in server info.

Here you will input your username (the part of your email address before @) and your password. For your server, input “backstage.<your company domain>”. For example, my email address is mike@torusoft.com. My username is “mike” and my server address would be “backstage.torusoft.com”. Make sure “Use Secure Connection (SSL)” is checked. Select Next.
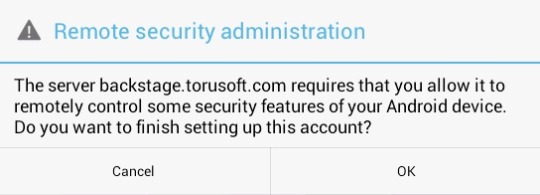
You will see a pop-up that will ask for Remote Security Administration. This is part of our managed devices service to keep your data safe. Select OK to continue.
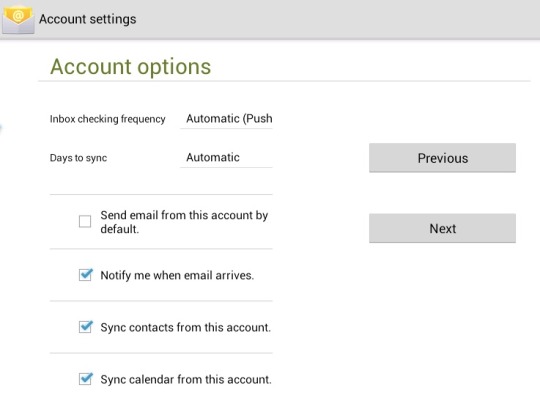
You will then get some Account options. The default should be safe for most, but change any settings that you feel are necessary. Select Next.
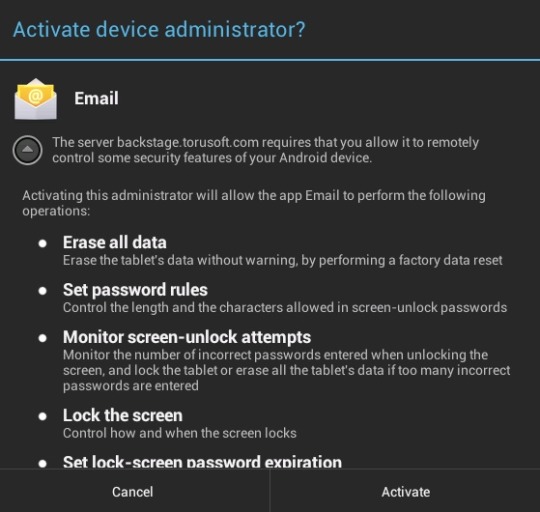
Activating the device administration is also required for managed device services to work. Please select “Activate” to continue.
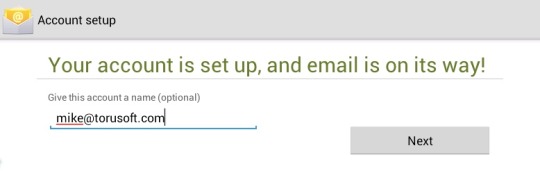
This option will allow you to change the name of the account. The email address should be fine for most. Select Next to complete.
Now head to the default email app on your Android device to use your email account. It may take a few minutes to sync all of your email.
Since there are many versions of Android and many manufacturers have created their own email application for their devices, these options may look different depending on the device you are using.