The best way to share contacts in Backstage Mail is via the web interface.
First, login to the webmail interface at your company’s server address, which should be backstage.<yourcompanydomain.com>
Once logged in, navigate to the Contacts pane.

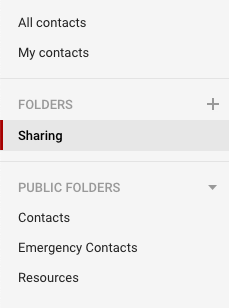
In the left bar, you will see various contact folders, including your own, any folders that are shared to you, as well as the server’s public folders. Click on the ‘+’ next to Folders and create a new folder, I’ve called mine “Sharing”.
After populating the new group with some contacts, we’re going to share it to another user. Hover over the folder’s name in the list, right-click (or left-click on the ‘▼’), and click on Sharing.

Click on + Add and begin entering the name of the user you wish to share with. Assign them a role of either Reader, Editor, or Owner. Readers can only view the contacts, Editors
can add, edit, and delete contacts, and Owners can do all of the above, as well as share the list to other users.
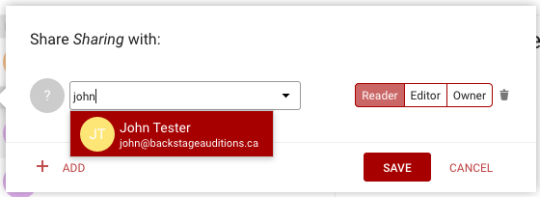
Click on save. Now have the other user sign in to enable the shared folder. When the other user sings in, a small gear icon is displayed next to Shared Folders. Click on that icon, and check the box next to the shared folder. After clicking Save, the shared folder will show up in the list.

This should automatically make these contacts sync down to all
of your devices as well. If you do not see the shared contacts folder on your phone,
tablet, or computer, you may need to check your sync settings. This can
be found in the webmail interface as well.
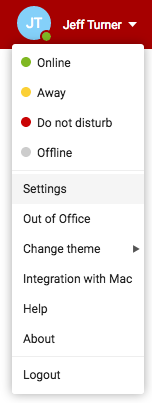
While logged into webmail, your name will be displayed in the top right corner. Click on your name and you will see Settings.
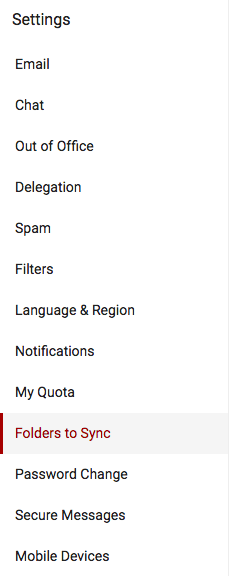
Now, in the left side bar, you will see a number of options. Click on Folders to Sync.
In the main panel, you will see all the folders you can sync down to your devices (calendar, contacts, email).
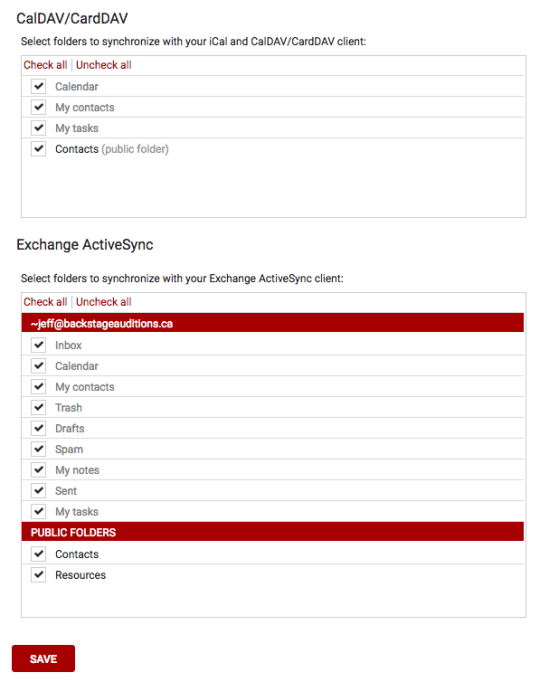
Unless
there is something that you specifically do not want to sync down to
your devices, you should be safe to click Check all for both
CalDav/CardDav and Exchange ActiveSync. Then click Save.
That’s it! We’ve successfully created a folder, shared it to another user, and ensured the folder will show up on all synced devices.