The best way to share calendars in Backstage Mail is via the web interface.
First, login to the webmail interface at your company’s server address, which should be backstage.<yourcompanydomain.com>
Once logged in, navigate to the Calendar pane.

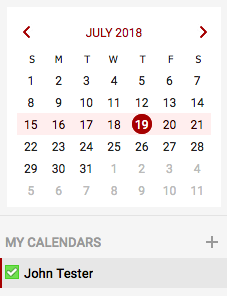
In the left bar, you will see your calendars. The default calendar will be titled with your name.
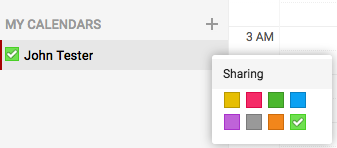
I am going to share my calendar with another employee, Jeff Turner. To begin, click on the share icon to the right of the calendar and click “Sharing”.
This will bring up the sharing interface. Click on the + and type in the name of the person to share with. If they are available, it should show automatically.
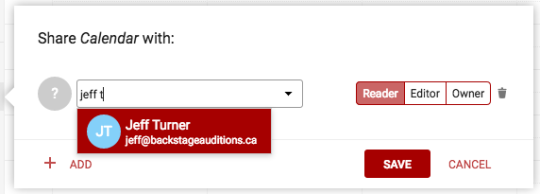
I will click on Jeff Turner to share with him. To the right, I will have three options: Reader, Editor, or Owner. Readers can only view the calendar, Editors can add events, and Owners can modify everything about an event created. I want Jeff to only view my calendar but not be able to edit, so I will leave “Reader” selected.
Click “Save”. Jeff will now have access to view my calendar.
Once a calendar is shared, there are some additional steps that the person on the other side should do to ensure they can see it.
Now, Jeff will log into the webmail interface and click on the “gear” icon to the right of “People”. This will show a list of calendars that other employees have already shared with Jeff.
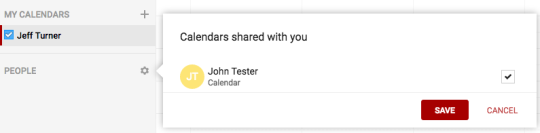
Jeff will click the checkbox next to my calendar to fill it and then click “Save”.
The shared calendar will now show in the web interface.
This should automatically make these calendars sync down to all devices as well. If you do not see the shared calendar on your phone, tablet, or computer, you may need to check your sync settings. This can be found in the webmail interface as well.
While logged into webmail, your name will be displayed in the top right corner. Click on your name and you will see “Settings”
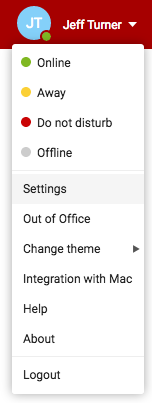
Now, in the left side bar, you will see a number of options. Click on “Folders to Sync”
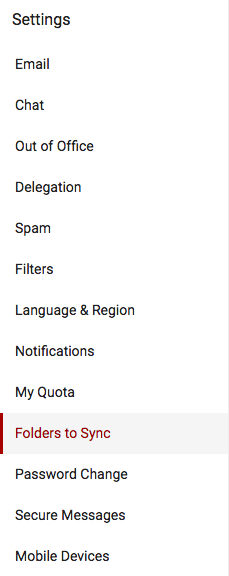
In the main panel, you will see all the folders you can sync down to your devices (calendar, contacts, email).
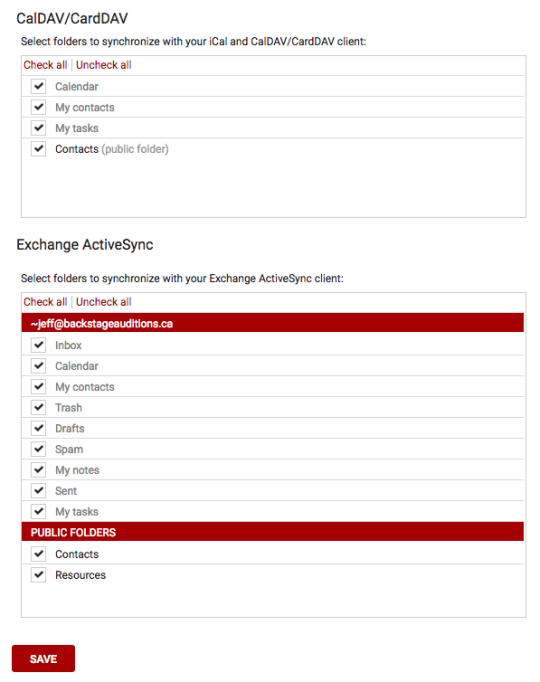
Unless there is something that you specifically do not want to sync down to your devices, you should be safe to click “Check all” for both CalDav/CardDav and Exchange ActiveSync. Then click Save.
That is it. There may be additional steps you will have to take in your phone, tablet, or computer applications to view these calendars. Please check our other articles for specific calendar client setup or reach out to us for assistance.