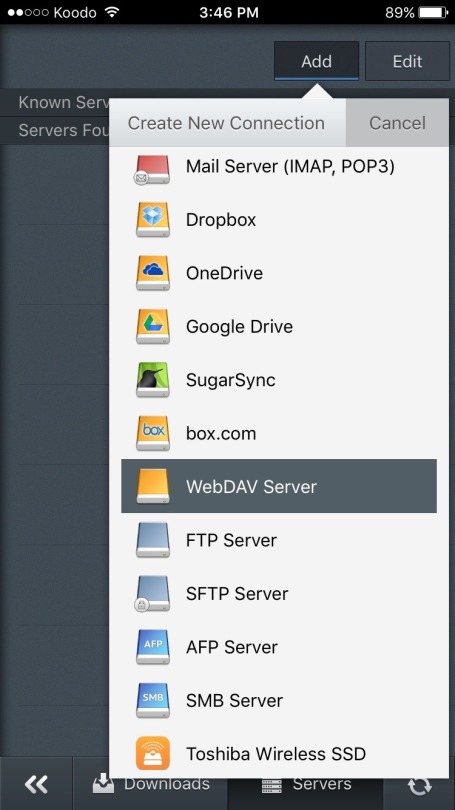
Start out by going to the Connect tab from the menu bar at the bottom of the screen.

Tap on Add, and select WebDAV Server from the submenu.

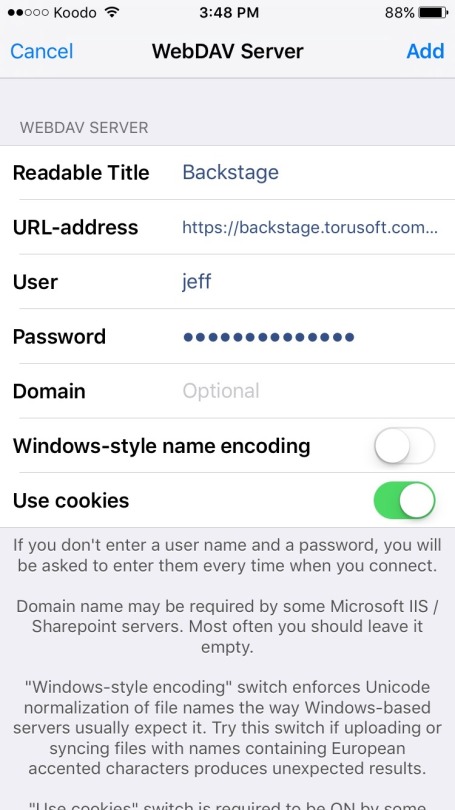
Readable Title: Set this to whatever you would like GoodReader to call the server. “Backstage” works just fine.
URL-address: “https://backstage.yourcompany.com:8443/owncloud/remote.php/webdav”, where “yourcompany.com” is replaced with your company’s domain. If you are unsure of the domain, it is the text following the “@” in your email address.
User: Your Backstage ownCloud username.
Password: Your Backstage ownCloud password.
Leave other fields as default, or as they are in the image above and tap Add.

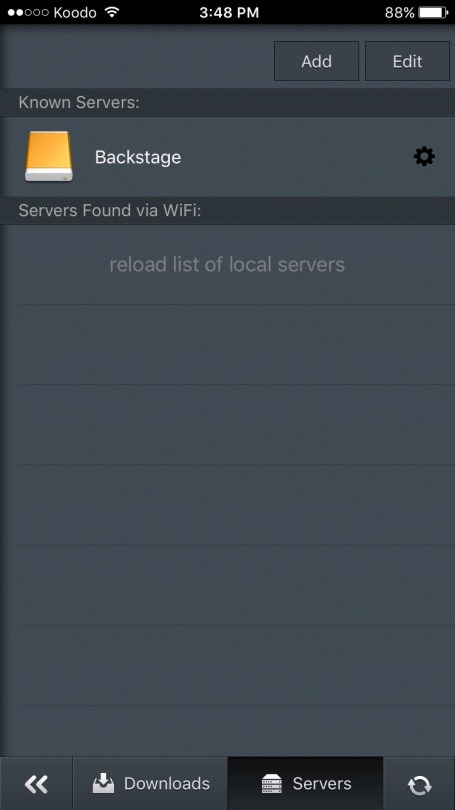
Your Backstage server should now be in the Known Servers list. Tap on it to browse your files on the server.

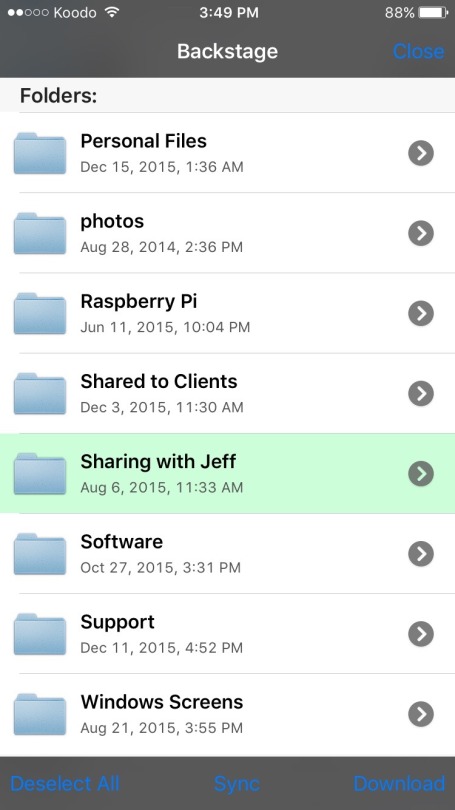
In the list of files and directories, tap the arrow on the right side to view the contents of a directory, or tap on the name of the file/directory to view Sync options.
Download will simply download a copy of the file or directory to GoodReader on your device. Sync will download the file or directory, but also keep it in sync with the server, so any changes you make on either end will be applied to both.
You are now finished setting up GoodReader on your iOS device!